Did you see Windows 10 Running Slow? Particularly After Recent Windows 10 May 2019 update system Not responding At startup. Take a long Time To stat or Shutdown Windows? Does the system crash while playing games or Application takes some Time to open? Here Some Useful Tips To Optimize Windows 10 Performance and Speedup System for Gaming.
Optimize Windows 10 Performance
Windows 10 is the Best ever quickest OS by Microsoft Compared to past windows 8.1 and 7 versions. Be that as it may, with everyday use, applications install/Uninstall, Buggy update installation, System file corruption makes the system slower. Here are a few changes and ways which you can Apply to quicken the presentation of Windows 10.
Ensure Windows is viruses and Spyware Free
Before Perform Any Tweaks or optimization tips first Make beyond any doubt Totally ensured structure Virus or Spyware infection. The vast majority of Time If windows Infected with virus/Malware infection this may cause buggy System performance. Virus Spyware Run on background, Use huge system resources and Slow down the PC.
We suggest First install A decent antivirus with most recent updates and play out a full system Scan.
Additionally Run Third-party System optimizer like Ccleaner to Clean junk,Cache, system error,memory Dump etc files. And Fix Broken registry Entries which optimizer windows 10 performance and make faster your computer.
Uninstall unnecessary programs
Again unnecessary installed unwanted software, aka bloatware is One of the biggest factors that slow down any Windows-based system. They use unnecessary disk space, use system resources which cause windows running slow.
So To Free up Disk Space and Save unnecessary System Recourse usage We recommend to uninstall all the unnecessary and unwanted programs which you never use on your Windows 10 PC.
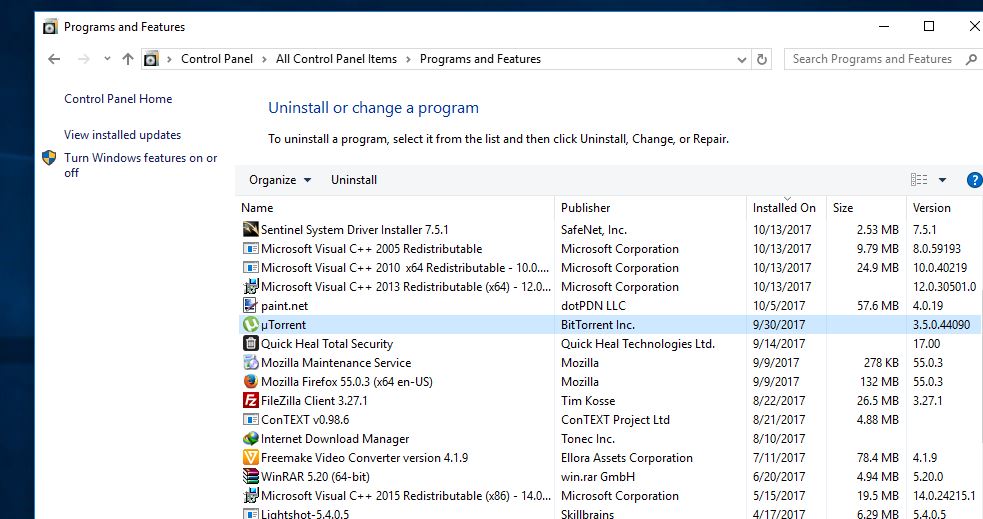
- To do this press Windows + R key type appwiz.cpl and hit Enter key.
- Here on programs and Features right click on the application which you want to uninstall
- And click Uninstall button to remove the app from your PC

Read also How to Remove Activate Windows 10 watermark permanently 2019
Adjust PC for the best performance
Windows 10 is best known for its excellent flat designs and the amazing transitions and animation effects. They provide a great user experience. But, visual effects and animations that increase the burden on the system resources. In the latest PCs, visual effects and animations may not cause a huge impact on power and speed. However, in older PCs, these do play a role so turning them off is your best option to optimize the performance.
To Disable Visual effects and animations
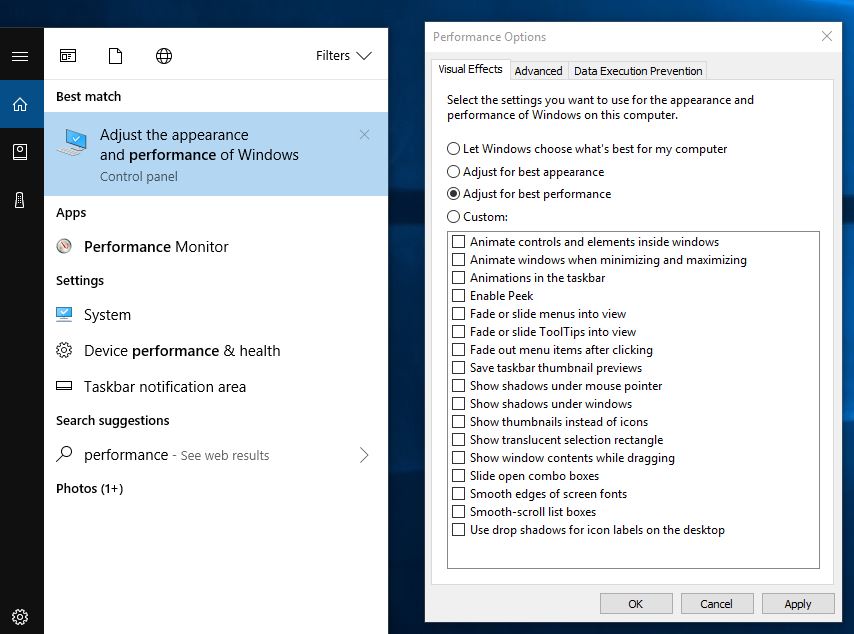
- Type Performance on Windows start menu search box
- click on the “Adjust the performance and the appearance of Windows” option.
- Now select “Adjust for best performance” and hit Apply button then click OK.
Go opaque
Windows 10’s new Start menu is sexy and see-through, but that transparency will cost you some (slight) resources. To reclaim those resources, you can disable transparency in the Start menu, taskbar, and action center: Open the Settings menu and go to Personalization > Colors and toggle off Make Start, taskbar, and action center transparent.
Disable Startup Programs
If you notice Windows Running very slow / Not responding at startup. Then there may be a huge list of startup programs (apps that start along with the system) which cause the issue. And These startup apps slow down the bootup process and degrade the device’s performance. Disabling such apps speeds up the performance of the system and improves the overall responsiveness.
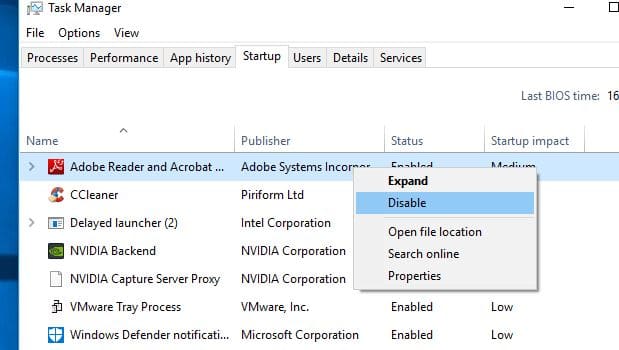
- Right-click on the Start button and click Task Manager.
- Click the Startup tab and peruse the list of programs that start up with your computer.
- If you see a program that doesn’t need to be there, right-click it and click Disable.
- You can also arrange the list of programs by Startup impact if you’d like to see the programs that are taking up the most resources (and time).
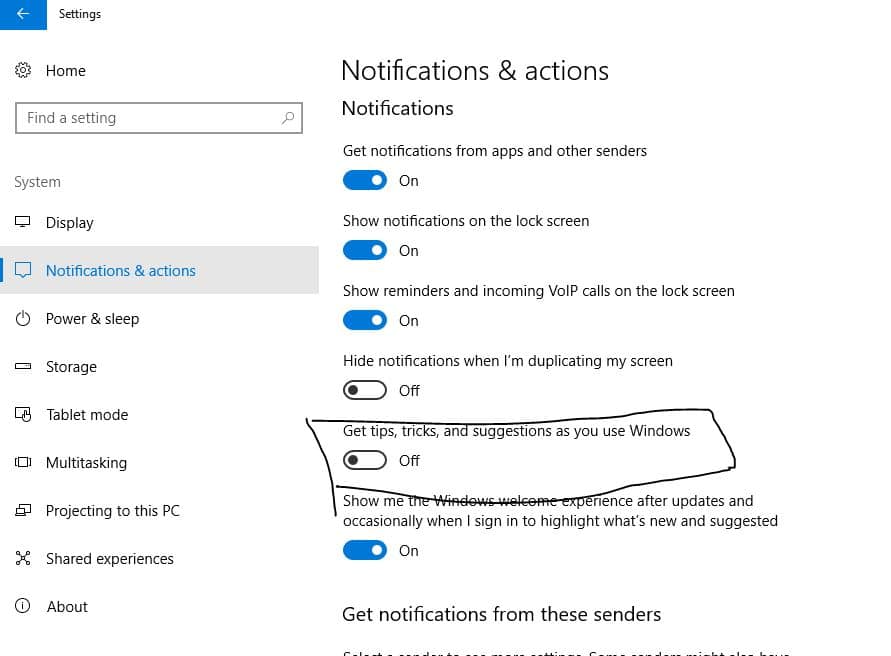
Say no To tips, tricks, and suggestions
In an effort to be helpful, Windows 10 will sometimes give you tips on how to get the most out of the OS. It scans your computer in order to do this, a process that can have a slight impact on performance. To turn off these tips,
- Go to Start > Settings > System > Notifications & actions
- Here toggle off Get tips, tricks, and suggestions as you use Windows.
Enable Windows Sandbox feature on Windows 10
Turn off background apps
Again Apps running in the background take system resources, heat up your PC and reduce its overall performance. That’s why it’s better to disable them to speed up Windows 10 performance and start them manually whenever you required.
- You Can Disable Background Running Apps From Settings click on privacy.
- Then go to the last option in the left panel Background apps.
- Here switch off toggles to turn off background apps you don’t need or use.
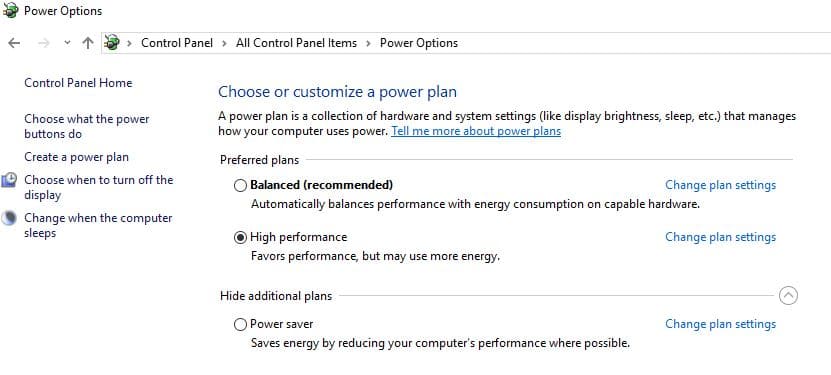
Set Power plan For High Performance
Power option also helps you to improve the performance of Windows 10 PC. But set The ‘High Performance’ mode in Power options help you make the best out of your PC. The CPU can utilize its full potential, while the high-performance mode prevents various components like hard drives, WiFi cards, etc from going into power saving states.
- You Can Set High-Performance power plan From
- Control Panel>> System & security>> power options>> High performance.
- This will optimize the performance of your Windows 10 for PC.
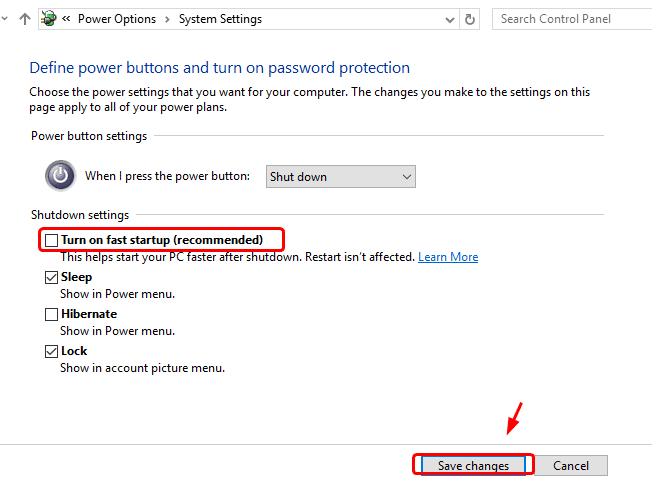
Turn On Fast startup and Hibernate option
Microsoft Added Fast Startup Feature, helps in starting your PC faster after a shutdown by cutting down on boot-up time, using caching for some necessary resources into a single file on the hard disk. At the time of startup, this master file is loaded back into the RAM that speeds up the process manifolds.
Note: This option does not affect the restart process.
You can enable or disable Fast startup From
- Control Panel -> Hardware and Sound and look under Power Options
- In a new window -> click on Change what the power buttons do
- Then click Change settings that are currently unavailable.
- Here Tick the box next to Turn on fast startup (recommended) and click save.
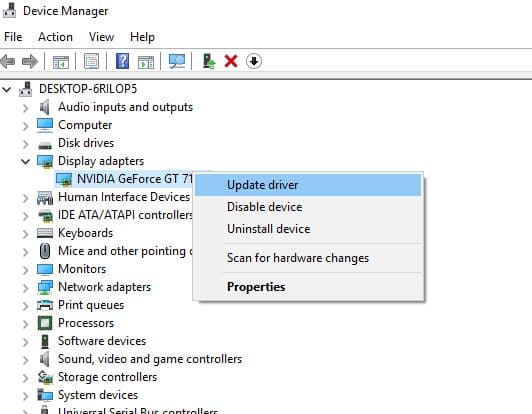
Make Sure Installed Device Driver Are Updated
Device Drivers are the essential parts of our system and they make it work properly. For every hardware, you need to install its driver in order to communicate and perform better. And if you are looking to optimize your Windows 10 especially for gaming then the most important driver update is the Graphic card drivers. Whether it is old or new, continually updating the Graphics card driver will enable it to use its full potential. If you do not update it regularly then you will face many problems such as low frame rate and sometimes it will not allow you to start a game.
To update device Drivers
- Open Device manager by Press Windows + R, type devmgmt.msc.
- This will open all installed driver list, here look for display driver expend the same.
- Now right click on installed Graphics Driver (Display driver) then select Update drivers.
- There are two ways to update drivers.
- You can directly update the driver just from the windows itself.
- And the other option is to visit the manufacturer’s website and get the up to date drivers from there.
You can update all the drivers but the most important drivers which need to be updated are
- Graphics Card driver
- Motherboard Chipset driver
- Motherboard Networking/LAN drivers
- Motherboard USB drivers
- Motherboard audio drivers
Optimize Virtual Memory
Virtual memory is a software-level optimization for improving the responsiveness of any system. The operating system uses virtual memory whenever it’s short of actual memory (RAM). Though Windows 10 manages this setting, yet configuring it manually gives much better results. Check Adjust Virtual memory To optimize windows 10 performance.
Check and fix HDD errors
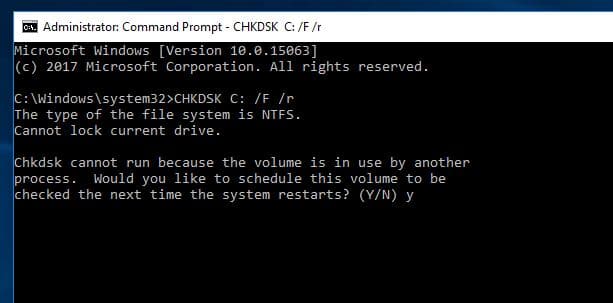
Some Times Disk Drive Errors Such As disk Drive damaged, Corrupted or have Bad Sectors cause Windows running Slow. We Recommend To Run the CHKDSK Command and add extra parameters to force chkdsk to force check and fix disk drive errors.
- To do this simply open command prompt as administrator
- Then type command chkdsk C: /f /r /x And hit the enter key.
- Press Y and Restart windows, This will Scan for and attempt recovery of bad sectors” and “Automatically fix registry error” too.
Run system file checker
Again sometimes corrupted, missing system files sometimes cause Different startup problems and Slow down the system performance. Especially after recent windows upgrade if system files get damaged or corrupted which may result buggy system performance. Run The System file checker (SFC utility) to make sure corrupted damaged system files not causing the issue.
- Open Command prompt as administrator,
- Then type sfc /scannow and hit the enter key.
- This will scan for missing or damaged system files
- If found any the sfc utility restore them from a special folder located on %WinDir%\System32\dllcache.
- After 100% complete the scanning process Restart windows,
If SFC failed to repair the corrupted system files then RUN The DISM command. Which repair the system image and allow SFC to do its job.
Optimize Windows 10 Performance for Gaming
Here some Advanced optimization Tips To speed up windows 10 Performance for Gaming.
Disable Automatic Updates
On windows 10 By default, the automatic updates function is always enabled. What it actually does is to automatically update your operating system to make it up-to-date always. It is also beneficial for you as you will get the latest features and security.
But on the other hand, it is not good for gaming on PC as it slows down the performance of PC gaming. The reason behind this is pretty clear that the automatic updates take place in the background and uses your internet connection and processing speed. For Better Gaming experience we recommend to Disable Windows 10 Automatic Updates.
Note: with Bellow Tweaks modify the Windows registry. We recommend to Backup windows registry before making any changes.
Disable Nagle’s Algorithm
- Press win+R, type Regedit and hit enter.
- In the new window which is Registry editor, just go to the following path: HKEY_LOCAL_MACHINE\SYSTEM\CurrentControlSet\Services\Tcpip\Parameters\Interfaces
- You will get many files in the Interface folder. Find the one which contains your IP address.
- After you find the required file, right click on it and create two new DWORD. Name of them as TcpAckFrequency and another one as TcpNoDelay. After creating both simply double-click on it and set their parameters as 1.
- That’s it. Nagle’s Algorithm will be disabled immediately.
Make System Gaming Responsiveness
There are many games which use MMCSS which stands for Multimedia Class Scheduler. This service ensures prioritized CPU resources without denying CPU resources to lower-prioritized background programs. Enable This registry Tweak boost the gaming experience on Window 10.
- First, press win+R, type Regedit and then hit enter.
- Now go to the following folder path: HKEY_LOCAL_MACHINE\SOFTWARE\Microsoft\WindowsNT\CurrentVersion\Multimedia\SystemProfile.
- There, you need to create a new DWORD, name it as SystemResponsiveness and then set its hexadecimal value as 00000000.
You can also change the value of some services in order to change the priority of games.
- Go to HKEY_LOCAL_MACHINE\SOFTWARE\Microsoft\Windows NT\CurrentVersion\Multimedia\SystemProfile\Tasks\Games.
- Now, Change the value of GPU Priority to 8, Priority to 6, Scheduling Category to high.
How To Stop / Disable Automatic Updates On Windows 10
Install Latest DirectX
Again To take your gaming experience to a whole new level, just install DirectX 12 on your system. It is Microsoft’s most popular API tool which can boost the gaming performance on your PC like never before. With the help of DirectX 12, you can boost the amount of work given to the Graphics card and make it done in lesser time. It lets your GPU multitask and hence saves rendering time, reduces latency, and gets more frame rate. Multi-threading command buffer recording and asynchronous shaders are the two evolutionary features of DirectX 12.