Windows 10 add an option called “Windows Spotlight” that turns lovely, curated images on your lock screen. At the point when the feature is enabled, new images download consequently consistently on your PC and enabling you to consistently have a new experience each time you open your device. These photos are great, a considerable lot of clients thinking spare Windows Spotlight pictures or set them desktop wallpaper. Here this guide How to Save Windows Spotlight Lock Screen Images in Windows 10.
How to Save Windows Spotlight Lock Screen Images in Windows 10
Enable Windows Spotlight
By default, Windows Spotlight feature is enabled on almost all PCs. If Windows Spotlight is disabled on your PC and you are not seeing the images on the lock screen, here’s how to enable Spotlight feature.
- Open Settings using keyboard shortcut Windows + I
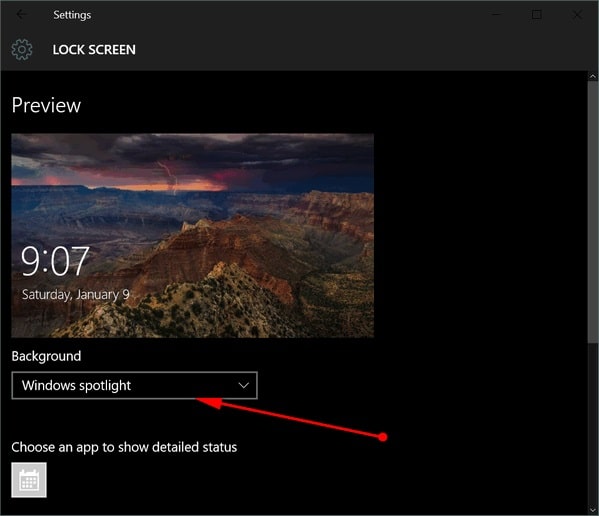
- Navigate to Personalization and tap on ‘Lock screen’ option.
- Under background option, select ‘Spotlight’.
- Wait for some minutes and the lock screen would start showing the spotlight images from Bing.
- Next time you lock your machine (Windows + L) or have the machine wake up from sleep you’ll see a stunning image.
Read more Secure windows 10
 How to Save Windows Spotlight Lock Screen Images in Windows 10
Save windows spotlight images Locally
Windows Spotlight images are stored in one of the sub-folders several levels underneath the Local App Data folder, with random file names containing no extension. follow steps below to find and save windows spotlight images on your local PC.
- Press Windows + R, copy and paste the following location into the Run box, and press Enter.
%UserProfile%\AppData\Local\Packages\Microsoft.Windows.ContentDeliveryManager_cw5n1h2txyewy\LocalState\Assets
- The File Explorer opens up at the location where all Windows Spotlight images are saved.
- The only problem is that they don’t show as the image file.
- We will need to rename them to make them look like regular image files by simply adding an extension name .jpg.
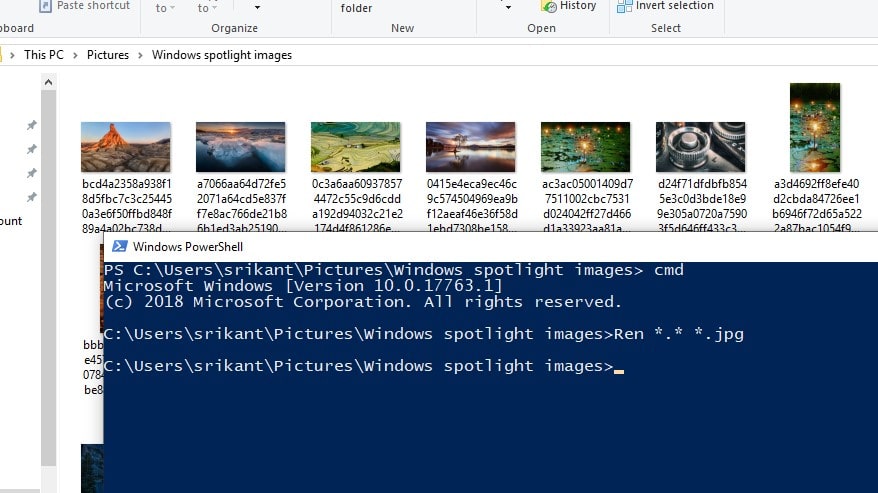
- Copy the files in this folder to another location on your computer where you can easily find them. Create a dedicated folder for these images.
- In the Explorer window for the new folder, open a Powershell window from the File menu.
- Run the following command to add a .jpg extension to all of the files you just copied:
- cmd
- ren *.* *.jpg
you may also like disable Blur Background Login Screen on Windows 10
 How to Save Windows Spotlight Lock Screen Images in Windows 10
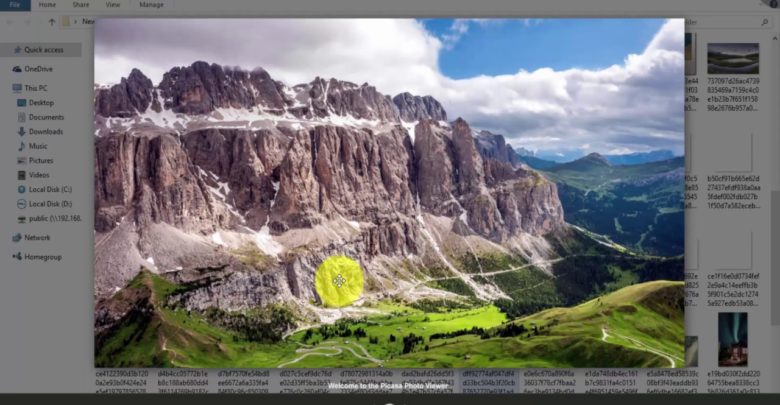
Thats all now you can view windows spotlight image in the photo viewer, or set them as desktop wallpaper.
Windows 10 spotlight not working
Some of the users report “windows spotlight not working after update” Either it disappeared or the same picture was displayed every time. This is because the proxy setting enabled that prevent download new spotlight image or the spotlight folder is corrupted. Here how to fix the problem.
- Right-click on the desktop. Click to open Personalize menu. Now open the Lock Screen tab.
- Under Background option, switch from Windows Spotlight to a Picture or the Slideshow.
- Press Windows + R, copy and paste the following location into the Run box, and press Enter.
- %UserProfile%\AppData\Local\Packages\Microsoft.Windows.ContentDeliveryManager_cw5n1h2txyewy\LocalState\Assets
- This will opens up at the location where all Windows Spotlight images are saved.
- Go to Assets folder and then press Ctrl + A to select all files. Now delete them.
- Now return to Desktop > Personalize > Lock Screen > Background.
- Finally, enable the Spotlight again and log off, check the problem fixed.
you may also learn Guide to Device Drivers on Windows 10, 8.1 and 7
Disable Proxy settings
- Press Windows + S to launch the search bar. Search for “proxy” in it.
- Press the option of “LAN settings” present at the end of the window.
- Uncheck the option “Use a proxy server for your LAN” and then press OK to save the changes.
- Now finally check if your issue is solved or not