Windows 10 full version has the self-initiated fixing process meant to solve various PC issues which prevent the machines from booting. The self-initiated fixing in the OS assists in fixing booting issues but many at times it does not function.
The OS self-initiated fixing
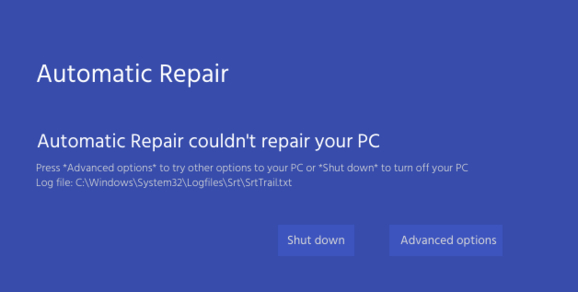
Once self-initiated fixing fails, it leaves a machine stuck on the startup fixing state. There exist 2 simple methods of windows 10 automatic repair loop fix:
You may choose windows 10 safe mode to access documents on the machine or clean the computer from viruses, however, to end the hp automatic repair loop windows 10, users will have to follow several procedures.
Since a machine will be restarting several times, users may never be able to reach the Advanced Options where they will correct that issue. So, a user will require booting from a DVD or a USB.
Make a bootable DVD or USB with an installing file inside it. This must be done on a different machine whose windows 10 media creation tool is working properly.
1. Users will start a machine from their DVD or USB and then access Command Prompt.
USB
Put a USB on the machine which failed to start. Upon powering on, press a function key (F2 or F12) to display boot menu.
DVD
Put the DVD inside the machine which failed to boot and wait for a statement that says “press a key to boot from DVD or CD” appears. Press whichever one you choose and go on. If that statement fails to appear, then users might need to alter the startup details on BIOS.
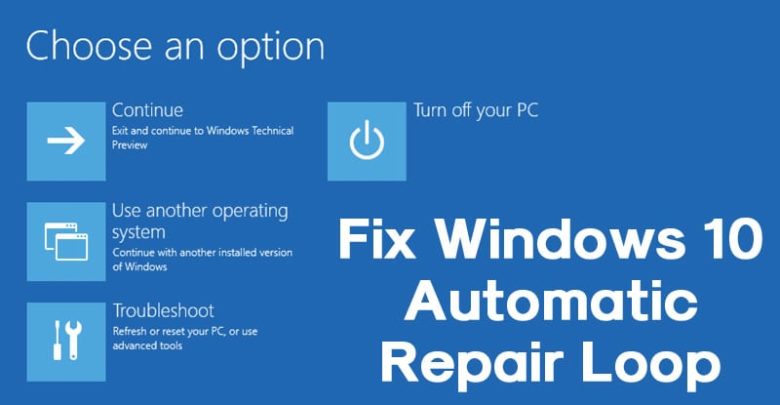
- On the setup display, pick a language
- Windows install display will appear. Choose Fix PC
- On the pick one option section, pick Troubleshoot
- Next click on Advanced section
- Pick the command prompt. There will emerge a different display which contains an open command prompt. If users are required to provide a password, provide the Windows one.
On the command prompt display, use these steps here to solve the loop errors:
- First process: Recover Windows Registry
What to do
- Type c:\windows\system32\config\RegBack\*c:\windows\system32\config and click on Enter
- If you are needed to overwrite the current files, type all and click on Enter.
- Type Exit and click on Enter to close the Command Prompt display
- Reboot the machine
- Second process: Deactivate Windows 10 self-initiated fixing
The self-initiated fixing feature exists when users download windows 10. That feature troubleshoots and repairs every usual issue which could stop a machine from functioning well.
If a machine is not able to boot 2 consecutive times, whenever you boot it a 3rd time, self-initiated fixing will be initiated. When self-initiated fixing takes place, a machine can perform several diagnosing processes to identify and solve issues.
But, if you understand how to clean up windows 10, you can consider troubleshooting and fixing PC boot issues manually. Or if you find that self-initiated fixing has unforeseen loops, you can deactivate the self-initiated fixing process.
here are processes which users must follow if they want to deactivate self-initiated fixing in the OS. Besides that, if self-initiated fixing was deactivated before and you would like to make changes, there are steps which you must follow also to re-activate the feature.
Deactivating self-initiated fixing on Windows 10
Though it may seem useful at first, self-initiated fixing isn’t always that helpful, especially for the advanced users. Thus if you are a user who wants to deactivate self-initiated fixing on their 3rd failed startup you can follow these main steps:
- Click on start button
- Look for Command Prompt
- Right click on the top finding result
- Pick Run as administrator
- Write the command “bcdedit” and press enter
- Note the reoveryenabled and identifier values under the Windows Startup Loader region. The values should be the same as:
identifier: {current}
recoveryenabled: yes
- The command that users will type in order to deactivate self-initiated fixing in Windows 10 is:
bcdedit /set {current} recoveryenabled no
Upon typing the above command, click on Enter.
On the last command, “current” is used to refer to a target Operating System part at the startup loader and the “no” value will stop self-initiated fixing.
Upon finishing all the above steps, the OS self-initiated fixing can never take place automatically again after the machine fails to boot three times. So you would need to enable it manually.
Enabling self-initiated fixing on the OS
Users who intend to re-activate self-initiated fixing in the OS should do this:
- Click on start
- Look for Command Prompt
- Right click on the top finding
- Pick Run as administrator
- Write the command “bcdedit” and press enter
- Note the reoveryenabled and identifier values within the OS Startup Loader region. The values should be the same as:
identifier: {current}
recoveryenabled: no
7. The command that users will type in order to deactivate self-initiated fixing in the OS is:
bcdedit /set {current} recoveryenabled yes
On the last command, “current” is used to refer to the specific Windows 10 part at the startup loader and the “yes” value will re-activate self-initiated fixing.
Once you have completed all the above processes, whenever you have issues during starting a machine, self-initiated fixing can start whenever you re-boot the 3rd moment.
Conclusion
Provided users are having a full operating system which contains the windows 10 home license key, they can be able to achieve all that has been explained above. They can even be able to perform windows 10 upgrade for assistive technology without any challenges whenever they want it.