however just in case you haven’t, associate degree animated GIF is a picture file that acts sort of a short video that loops endlessly.
most of the people use them very like they are doing emojis, to specific emotions via text message or social media. however have you ever ever thought of victimization them in your e-learning? They’re super obvious, that makes them a good thanks to capture and hold your learners’ attention.
Better yet, GIFs are super-easy to include into your Rise courses! anyplace you’ll be able to insert pictures in Rise you’ll be able to insert animated GIFs and it simply works.
But if you don’t have a motion designer available, you will be curious however you’ll be able to produce your own GIFs while not lots of your time and energy. sensible news! With plot line 360, creating your own animated GIFs is straightforward. All you’ve got to try to to is follow these four straightforward steps.
1. produce associate degree Animation in plot line
Any animation that you simply produce in plot line are often regenerate to a GIF. however before you GIF-ify all of your animations, consider whether or not it is sensible.
Would turning this animation into a GIF facilitate have interaction learners or distract them? wouldn’t it facilitate them higher perceive the fabric or just function visual bling? It’s vital that the GIFs support your learning objectives, not remove from them.
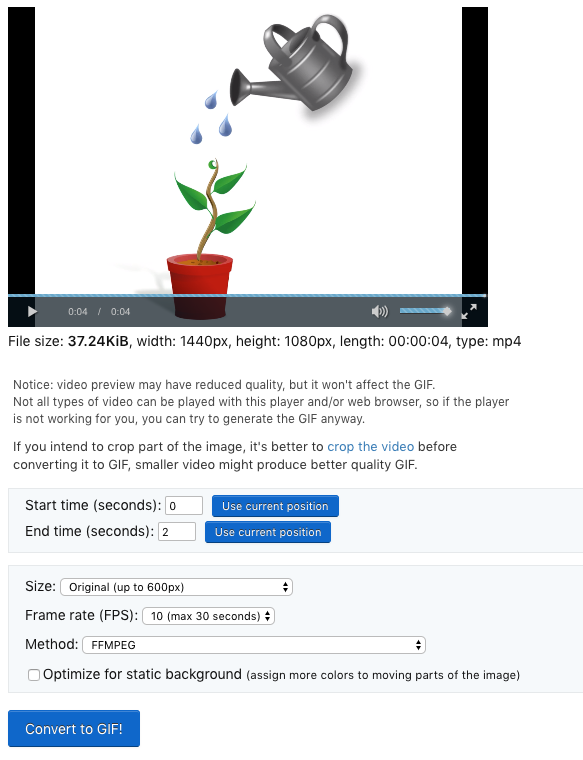
For the needs of this tutorial, I created an easy animation of a watering pot running water onto a plant that might be employed in a course on husbandry.
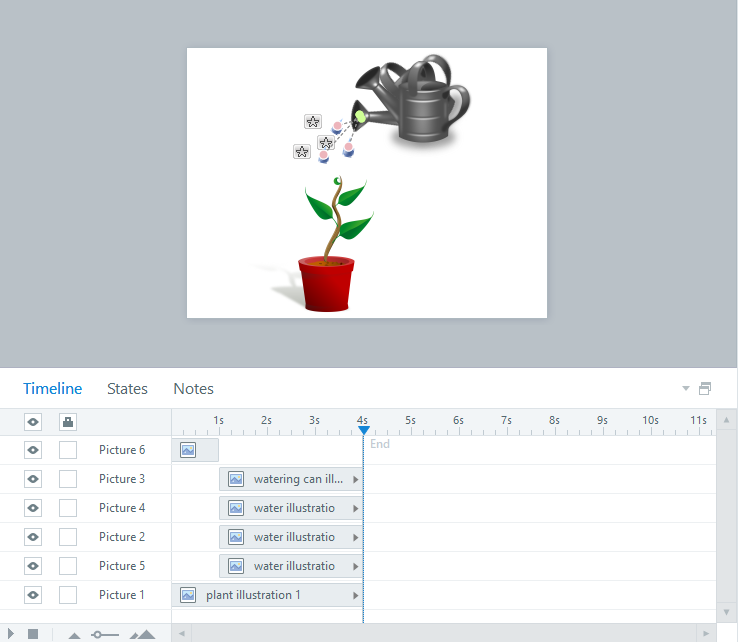
To create this instance I inserted some Content Library illustrations, accessorial motion methods to the water droplets, and regular the arrival of the objects on my timeline.
For a lot of info on the way to insert motion methods and work with the timeline, take a look at these articles:
Syncing Motion Path Animations
Working with the Timeline
2. Publish Your Project to Video
Once your animation is complete, choose the Video tab from the Publish window and click on Publish.
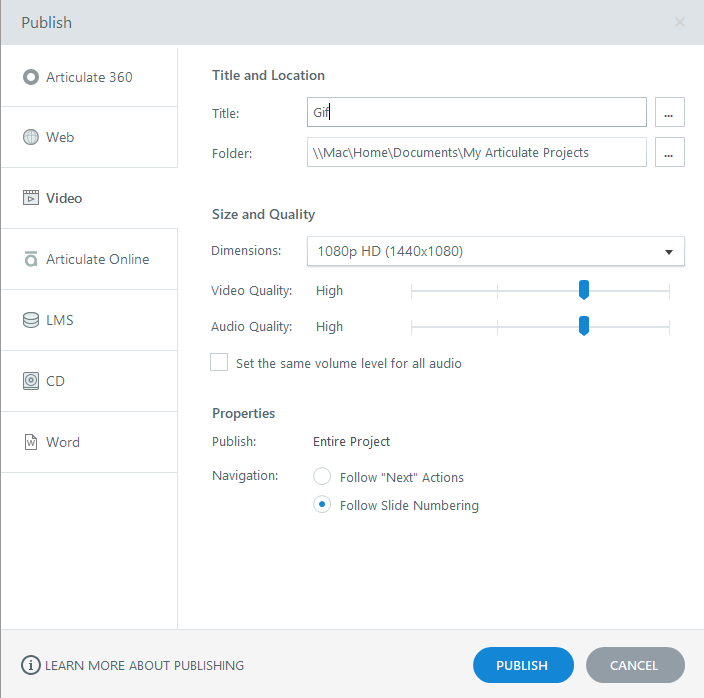
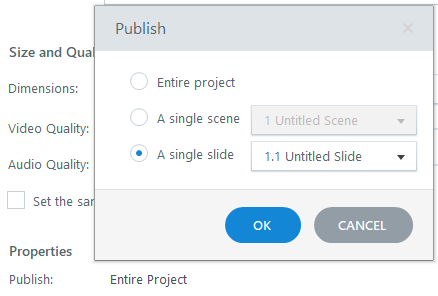
Note that, by default, plot line can publish your entire project to video. If you simply wish to publish one scene or slide, merely click on the whole Project link and choose the scene or slide in question within the pop-up window.
3. Convert to GIF
Finally, transfer your video to at least one of the numerous free on-line video-to-GIF converters. The one I’ve been victimization recently is termed EZGif.
On EZGif, you merely transfer your video, choose the frames you would like to incorporate, and click on Convert to GIF!

From there you’ll be able to transfer your GIF and use it but you’d like!
And you’re done! It’s as straightforward as that.
More Resources
Now that you just know the way to form your own animated GIFs, you’ll be inquisitive the way to use them in meaningful ways that in your e-learning courses. Well, you’re in luck! There’s a piece for that: three Reasons to Use Animated GIFs in E-Learning.
Strapped for time? We’ve got you. Here are a bunch of gorgeous GIFs you’ll be able to transfer for free:
Rise cowl pic GIF-Away
Free Animated GIFs for Header pictures
And if you’re trying to find alternative visual style tricks to assist catch and keep your learners’ attention, try these articles:
What Motion Graphics Are & Why you must Use Them in Your E-Learning Courses
3 Motion Graphics–Inspired Transitions you’ll be able to produce in plot line
Remember to follow USA on Twitter and are available back to E-Learning Heroes often for a lot of useful recommendation on everything associated with e-learning. And if you have got any queries, be happy to share them within the comments section below!