There are a number of different ways to do so in Windows and which method you prefer will be entirely down to your preferences. We’ll walk you through the easiest way to start off — and then offer an alternative method at the end.
Step 1: Capture the image
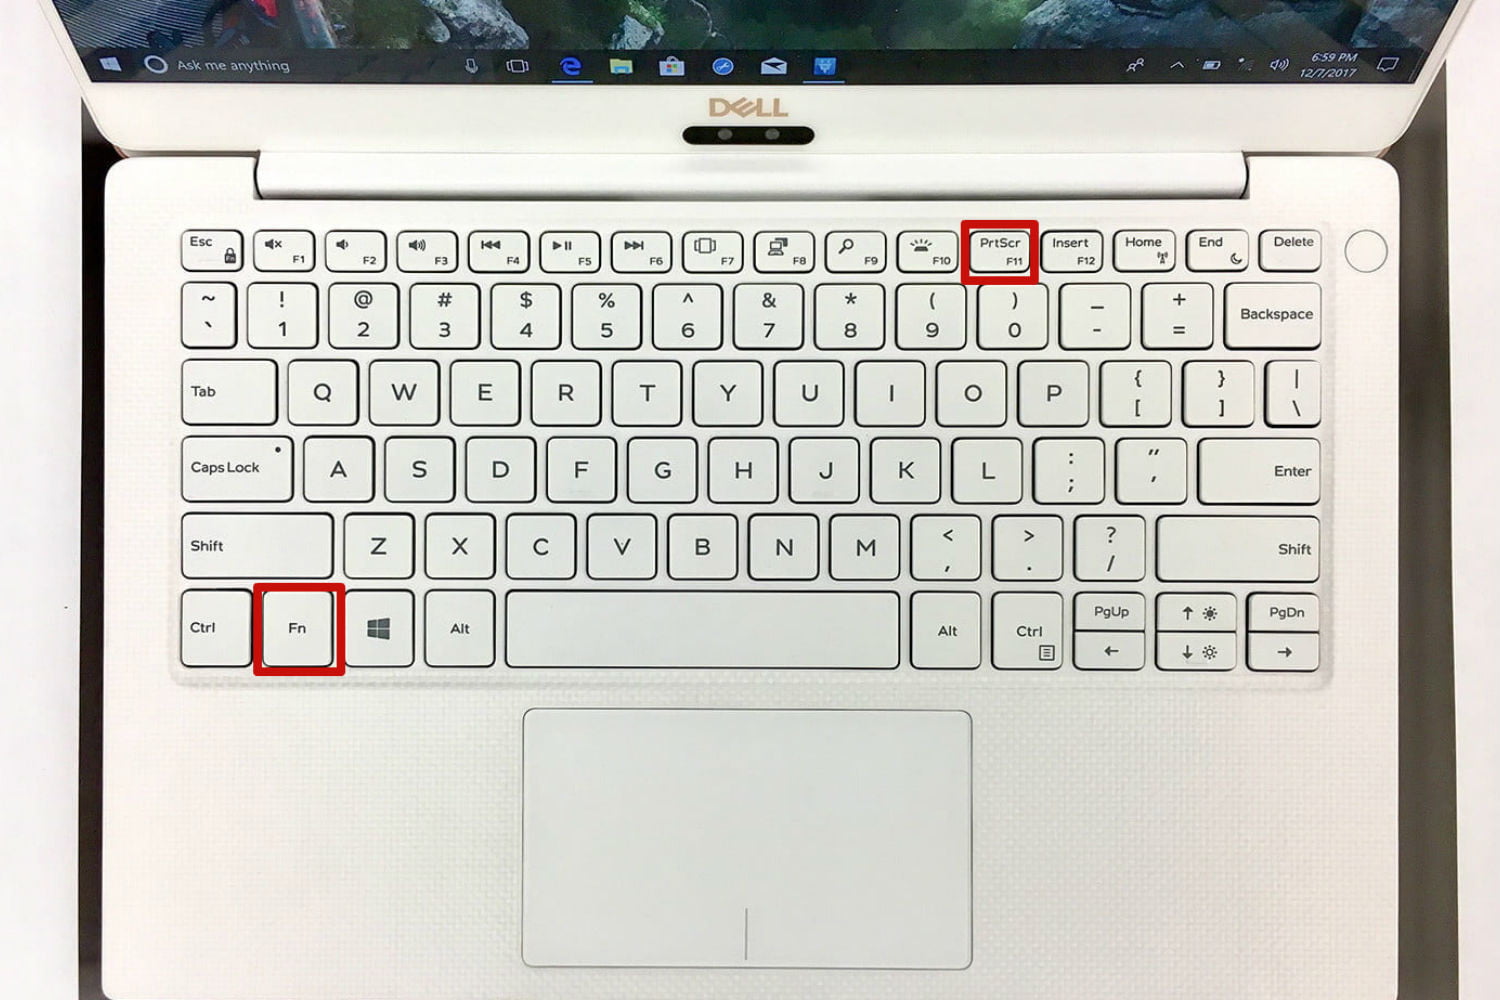
Bring up whatever it is you want to capture on your screen and press the “Print Screen” (often shortened to “PrtScn”) key. It’s typically located in the upper-right corner of your keyboard and will take a screengrab of everything on all of your displays. Alternatively, press “Alt + Print Screen” to capture a screenshot of the active window. If you’re on a laptop, you may need to press “Fn + Print Screen”
or the “Windows key + Print Screen” if your laptop has another feature assigned to that particular key.
In many computers, your screen will flicker or darken briefly to let you know that the screenshot has been taken. However, sometimes there’s no obvious sign that screenshot worked, so you’ll have to look in your storage to make sure it was taken. Note that if you aren’t using the Fn key, make sure that the key is not illuminated or turned on: On some laptops, a lit Fn key will prevent the screenshot process from working properly because Windows registers three keys instead of two (same with Caps lock, etc.).
Microsoft’s OneDrive will typically save the screen automatically in the OneDrive folder. You will now be able to find it there, in Pictures, under Screenshots (the Screenshots folder may appear if this your first one). You can go here to open the file and rename it if you wish. If you have Dropbox installed, the screenshot may also be automatically deposited in your Dropbox directory, under Screenshots (ideal for your “Showcase“).
Step 2: Open Paint
Check out your screenshot in the Screenshots folder. If you like it just the way it is, great! You can save it, move it, attach it to an email, and upload it wherever you need. However, for many screenshots you may also want to crop or alter it in some way. There are many programs that can do this, but the one closest at hand is the long-suffering Microsoft Paint.
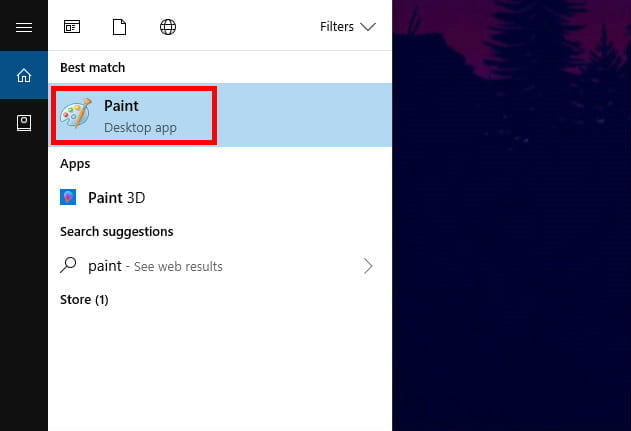
As long as you’re running the latest version of Windows 10, type “Paint” into the Windows search bar and click the corresponding result.
Step 3: Paste the screenshot
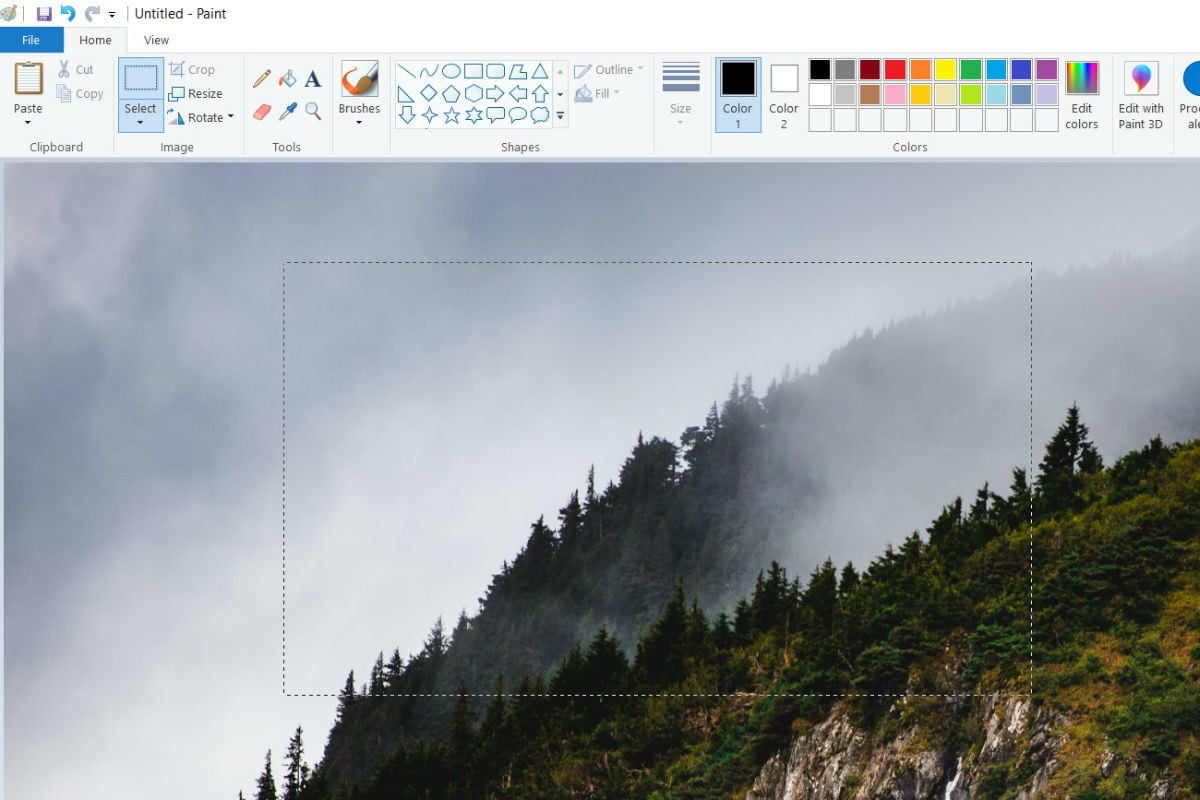
Once Paint is open, click the “Paste” button in the upper-left corner of the program, or press “Ctrl + V” on the keyboard to paste your screenshot. You should see the image you captured appear in your edit windows in Paint.
From there, perform any edits you want, including cropping or selecting a certain part of it.
Step 4: Save the screenshot
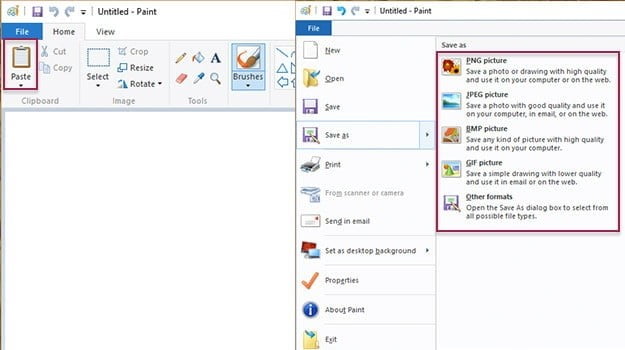
Click the main “File” option in the upper-left corner, followed by “Save as.”
Title the new file, choose a save location, and select your desired file format from the drop-down menu. For most purposes, JPG will do fine, but a variety of other formats are available to choose from such as PNG, BMP, GIF and others. Click the gray Save button in the bottom-right corner when finished.
And that’s it! You’re done.
Alternatives: The Snipping Tool
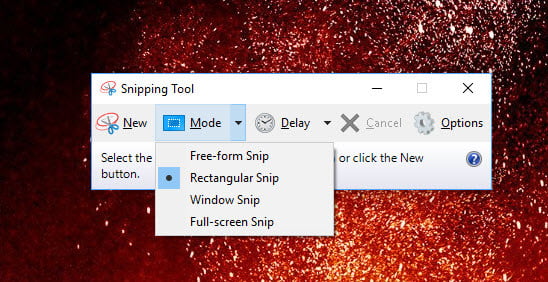
The best alternative method is the Windows 10 Snipping Tool. The built-in screen capture utility in Windows works well enough, but it’s not the most robust or versatile when it comes to saving a snapshot of your screen. The Snipping Tool, however, is a utility that allows users to better define and capture portions of their desktop display as a screenshot, without the need for a keyboard. If it’s been enabled in the Settings menu, hitting “Print Screen” might even bring it up to give you easy access.
If not, just type “Snip” into the Windows 10 search bar to open it up. From there, it’ll give you options such as drawing a “Free-form Snip,” a “Windows Snip,” or a “Rectangular Snip.” You can even set it to delay a certain amount of time if you’re trying to capture a precise moment in a video or animation.
It’s a tool that’s constantly evolving though, and with the Windows 10 October 2018 update, it partnered up with image editing functions to create the Sketch and Snip application. Now, any time you take a screenshot it will automatically appear as a thumbnail — like MacOS Mojave does — so that you can then take it straight to the Snip and Sketch app for easy editing.