Are you an enormous fan of Razer? If affirmative then I’m certain that you simply would be having the expertise of Razer keyboard and mouse. The product by Razer don’t seem to be solely versatile however conjointly reliable. tho’ typically you would possibly face some problems with Razer colligation. If you’re unable to access Razer colligation, then stop worrying as you’re on the proper page.
If you’re a gamer and victimization Razer colligation devices then this is often a awfully frustrating issue for you. as a result of thanks to Razer colligation not operating, you can’t connect your Keyboard and Mouse to your Windows laptop and so cannot play Games. thus here are some fast solutions to mend the error. Razer colligation as you recognize helps you to manage alternative Razer devices.
Also, one in all the most important reason behind such error is corrupted or missing or drivers. you have got to transfer and install the newest version of Razer colligation Drivers for Windows.
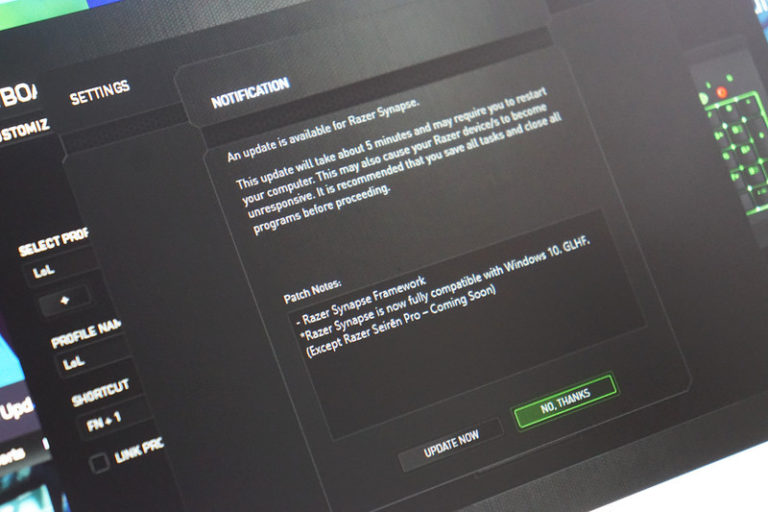
Fix Razer Synapse not Working on Windows 10
Before moving on to the solutions, first, you ought to fathom the explanation for Razer colligation Not performing on Windows 10/8/7. If any of your Razer devices is superannuated or corrupted, then there are possibilities of Razer colligation Not operating. Here is that the gradual guide which is able to facilitate your in Razer colligation repair.
Method 1- Uninstall and Reinstall the Razer Devices Installed on Windows
Download Razer Synapse Drivers from the official website and install it. Also make sure that while installing any driver, you are logged into the administrator account.
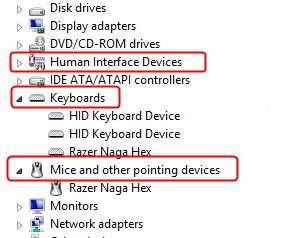
Step 1: Open Run using Win + R command > Type devmgmt.msc > Ok.
Step 2: Expand the Human Interface devices > then click Keyboards.
Step 3: Locate Mice and other pointing > Expand it.
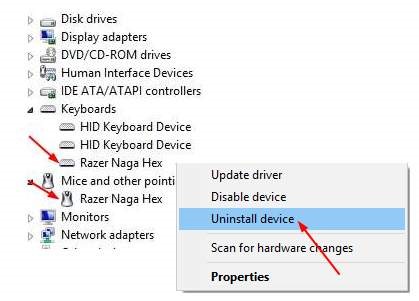
Step 4: Right click on Razer devices > Uninstall.
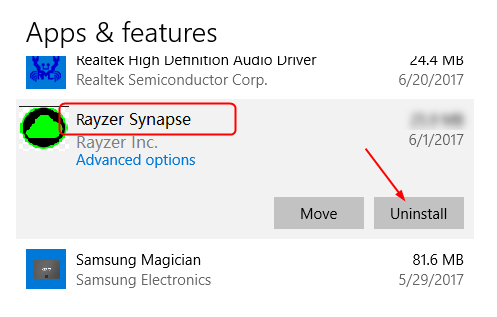
Step 5: Go to Programs from the search menu > Apps and Features.
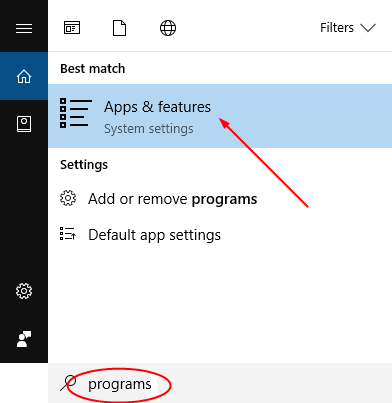
Step 7: Choose Razer Synapse and click on the Uninstall option.
Step 8: Now unplug all your Razer devices from the system. Plug them back after 5 minutes.
Windows will then install the drivers of your Razer devices, and Razer Synapse will start working again. Just download and install it again.
Method 2: Disabling Razer Surround
Step 1: Uninstall Synapse > delete old files.
Step 2: Download Razer Synapse > Install the software > Connect Synapse to the internet.
Step 3: Click on Razer Surround > cancel. Do not update it. Restart your PC and when done, try and see if the problem is solved or not.
Method 3: Remove/Disable Antivirus
Turn off firewall/Antivirus if you are using any. Sometimes Antivirus is blocking some services which are required to run Razer Synapse.
Method 4: Download Microsoft .NET Framework
Remove and reinstall the latest version of Microsoft .NET Framework.
Reboot the computer.
This will fix the Razer Synapse Not Working issue for sure.
Method 5 – Install and Update the Drivers with Driver Easy
Step 1: Download driver Easy. It is one of the best driver update tool for Windows.
http://www.drivereasy.com/DriverEasy_Setup.exe
Step 2: Run > Scan Now.
Step 3: Driver Easy will scan your entire system. It will scan for all the required drivers for your Windows. Download and install all and reboot PC. Check if you are still facing the error or not.

Method 6: Check Compatibility
Heres solutions for Windows 8 and 7:
Windows 8: Open synapse properties > Compatibility > run program with windows 7.
Windows 7: Same as Windows 8, but make sure to open with admin, and no antivirus is running.
Thanks for reading this article. Provide your valuable feedback.