When Microsoft launched Windows Vista, The UAC (User Account Control) was the absolute most criticized and misconceived part. Although it is quite important for safety and security, several consumers have decided to disable it and subject their computers to safety problems. This feature has signified strengthened in the following models of Windows. Although it includes a whole lot to the protection of the os, some customers still prefer to disable it. To address this issue, in this article, we try to clarify what this User Account control is and how it works. The advantages of having it active, in any windows version.
What is UAC
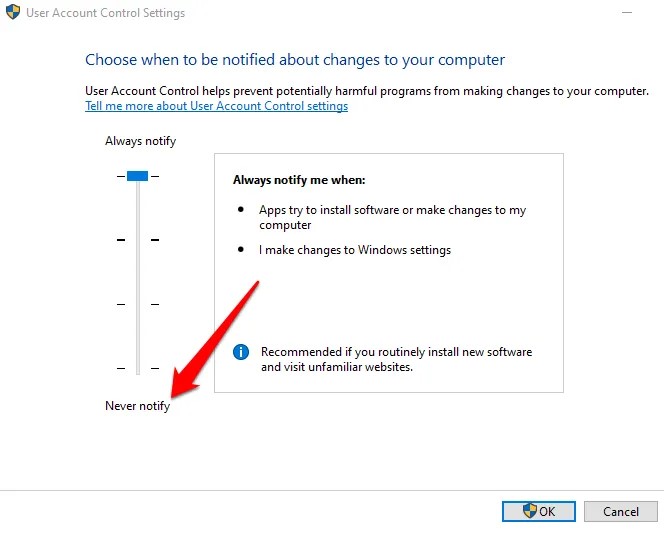
UAC Slider introduced in 4 levels in Windows 10 with the same mean as in windows vista. However, there are actually 4 UAC degrees to decide on coming from:
1. Constantly Notify:
2. Send Notification Only when programs/apps try to changes the system settings:
3. Notify me merely when programs/apps try out to create improvements to my computer system:
4. Don’t notify Me:
Think Twice Before Disable UAC:
Simple Ways To Disable UAC
If still, you think User Account Control is irritating, You can disable it quite easily from the Control panel, Registry Editor, From Group policy, and Command-line method. Here, we discuss all these methods one by one separately.
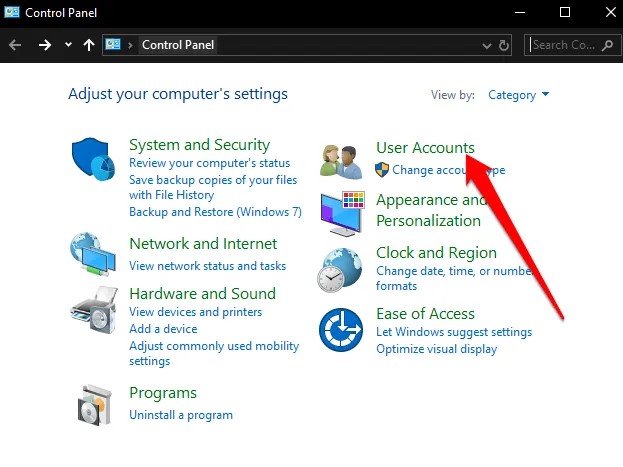
1. UAC Disable From Control Panel
- Go to your computer user account from the control panel of Windows
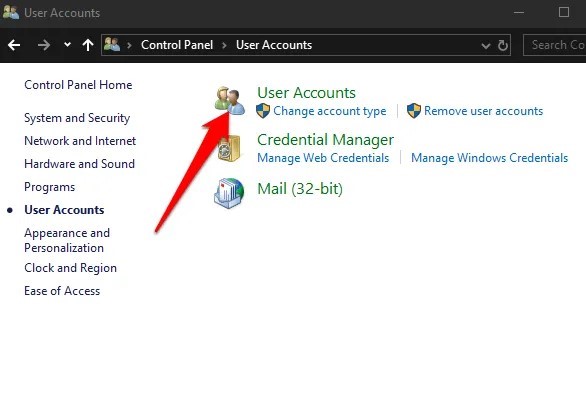
2. Here just click on the user account and further see in the last option ”Change User Account Control Setting”

3. As you click, a window open as showing and select the level as you want.
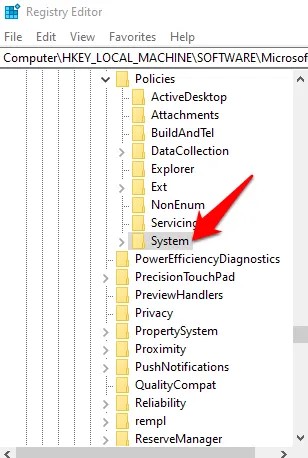
2. UAC Disable From Registry Editor
User Account Control can be disable from windows registry editor. This method is slightly different from all because before doing change make sure that you have a backup of windows registry.
- To disable UAC through Windows Registry, go to the start menu and right-click their. Open the run exe and right there regedit.exe and press the enter button. A pathway open, follow this. HKEY_LOCAL_MACHINE\SOFTWARE\Microsoft\Windows\CurrentVersion\Policies\System. New window will open as mention in below image:
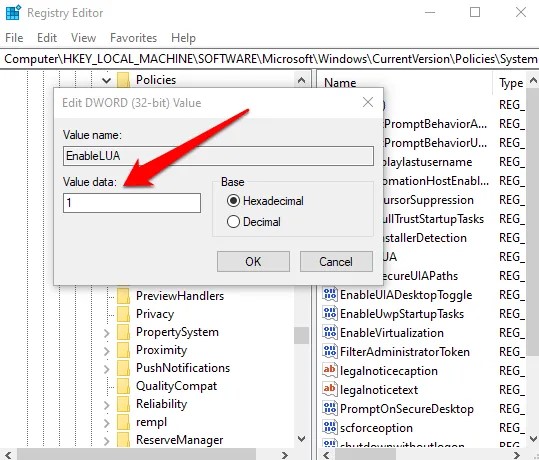
2. Now, double-click on the key EnableLUA from value name cell and change the value data option from 1 to 0.
3. As you complete this, restart your system.
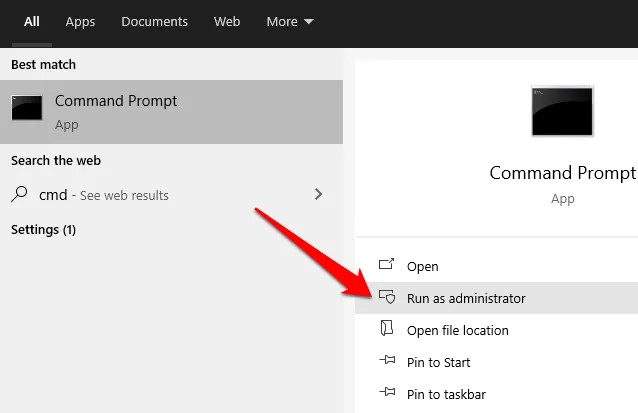
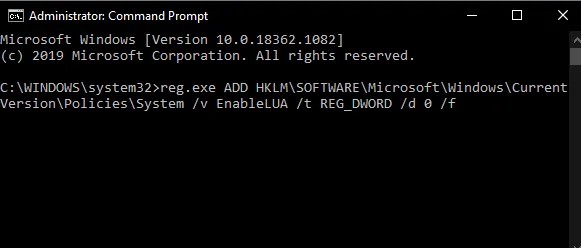
3. UAC Disable From Command Line
- To do disable UAC from command line simply go to system start menu, right their CMD and select Run as Administrator as shown in below image
2. Write their given below command and press enter button:
reg.exe ADD HKLM\SOFTWARE\Microsoft\Windows\CurrentVersion\Policies\System /v EnableLUA /t REG_DWORD /d 0 /f
reg.exe ADD HKLM\SOFTWARE\Microsoft\Windows\CurrentVersion\Policies\System /v EnableLUA /t REG_DWORD /d 1 /f
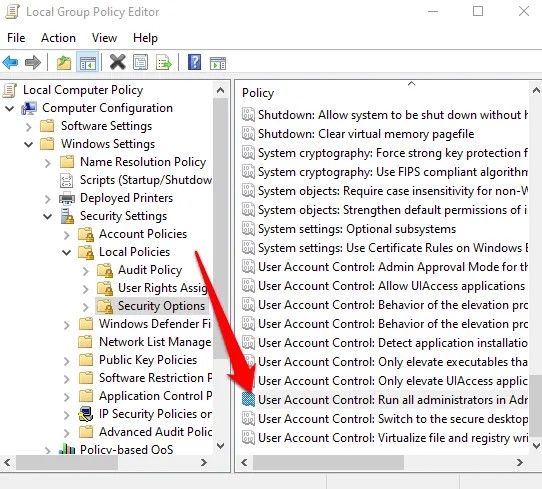
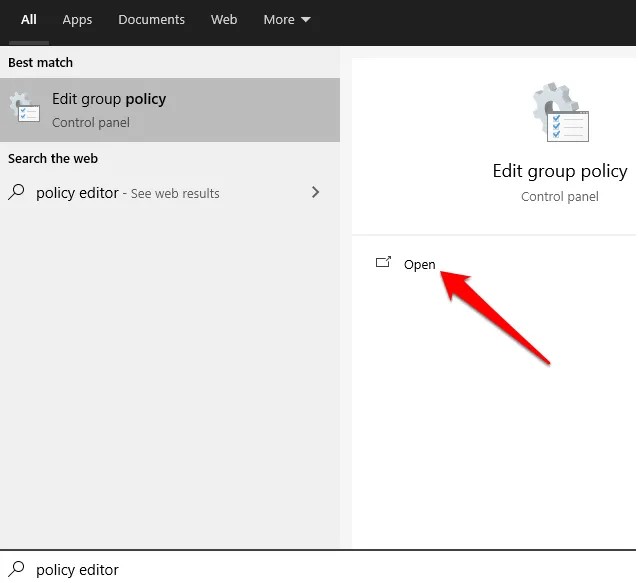
3. UAC Disable From Policy Editor
- Disable UAC from policy editor, you just need to go start menu and write Policy Editor in the search box. From there select Edit Group Policy.
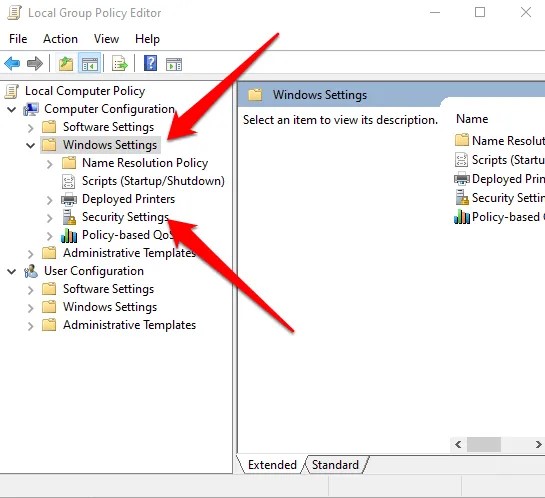
2. Here, Select Computer Configuration > Windows Settings and then select Security Settings.
3. Later, select Local Policies > Security Options.
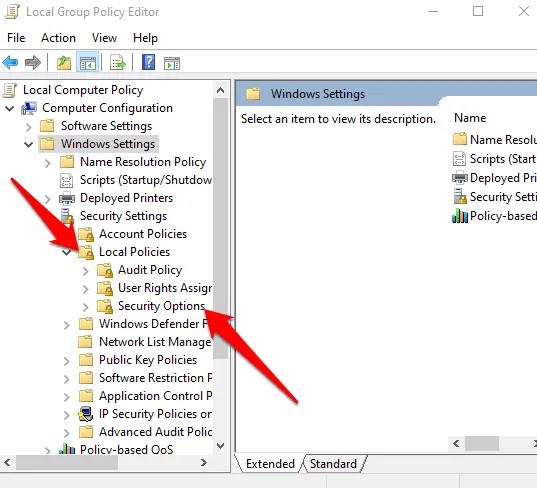
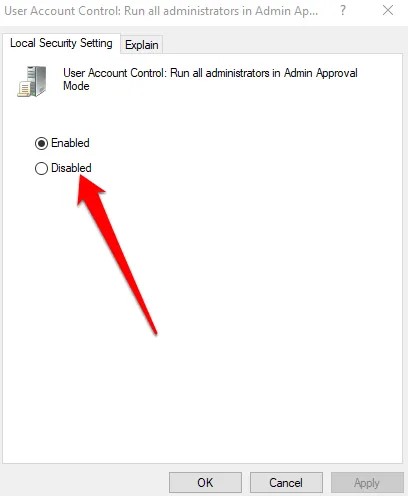
4. Now do select User Account Control: Run all administrators in Admin Approval Mode by double-click. From here do Disable and press OK button as showing image