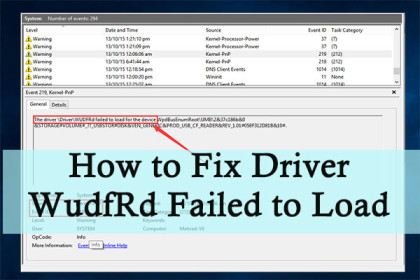
Most customers who have upgraded to Windows 10 have experienced the “driver wudfrd failed to load” problem. Kernel-PnP is the source of the error, which has Event ID 219 assigned to it.
Error 219 is another name for this problem. When this error occurs, a warning will appear in System Log each time you boot your computer. If you look at the screenshots below, you can read the description of the error 219 in case Audience: The device’s filling driver, Driver WudfRd, has stopped working.
The Driver WudfRd Was Unable To Load In Windows 10, Best Ways To Fix It
Here are the specifics about driver wudfrd failed to load that you can learn about in this article:
What causes this blunder? Your drivers will be updated as well when you upgrade to Windows 10. This will cause a conflict between the drivers and the hardware, resulting in error 219. Furthermore, even if you did not upgrade your computer to Windows 10, an issue may arise if a specific service is disabled.
You can try the services listed below to fix the “driver WudfRd fails to load” error.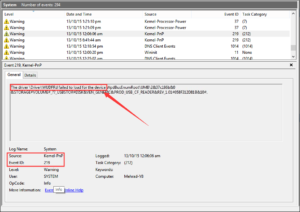
Method 1: Revise Windows
Because Windows updates may also update your chauffeurs, you can try manually searching for fresh updates to resolve this issue.
1: To open Settings, press Windows + I.
2: Select Update & Security > Windows Update from the left-hand menu.
3: Click Look for updates in the right pane to set up all of the pending updates.
Restart your computer after updating Windows to see whether the error 219 has been resolved.
When attempting to update Windows, some customers have reported getting the error 0x80070bc2. This can be fixed quickly, and a variety of services are available through the mail.
Method 2: Enable the Windows Structure Service for Motorists
For drivers, the Windows Motorist Foundation is a must-have application. If the service is disabled, you may receive an error stating that “driver WudfRd failed to load.” To enable it, simply follow the steps outlined below.
1: To open the Run window, press Windows + R. In the dialogue box, type services.msc and click OK.
2: Double-click Windows Driver Foundation– User-mode Chauffeur Structure service in the Solutions main interface to view its Attributes window.
3: Change the Startup type to Automatic under the General tab. Check to see if the service is up and running. If the answer is no, you must click the Start button to enable the service. Then, to save the changes, press Apply & OK.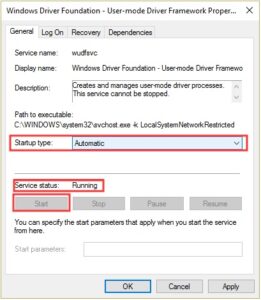
You can now restart your computer system, and the issue should be gone.
Method 3: Disable Hard Disk Hibernation
Disabling hard drive hibernation is another tried and true technique for resolving the “driver WudfRd failed to load” error. So you can try your hand at it.
1: From the Start menu, press Windows + X and select Power Options.
2: In the best pane, click Extra Power Settings, which will open Control Panel, as shown in the image below. Then, under your current power plan, click Modification plan settings.
3: On the new page, click Modification innovative power settings.
4: Expand the Hard disc and Turn off the hard plate after in the Power Options window. Both the On series and the Plugged in series should be set to Never.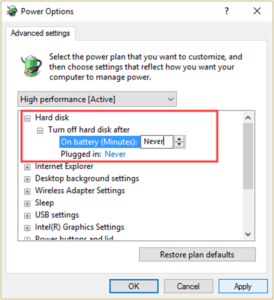
5: Click Apply and OK.
Restart your computer after it’s finished. You should now be able to use your computer without encountering problem 219.
Do you find it difficult to choose to sleep, hibernate, or shut down your Windows 10 PC? Continue to discover and you will enjoy getting the details of fantastic assistance here.
Method 4: Update Drivers That Are Incompatible
You can also try upgrading incompatible drivers to fix the problem. The incompatible motorists will have an exclamation mark beside them in Device Supervisor, making it easy to find them. Simply avoid this strategy if all of your drivers are compatible. If there are any incompatible motorists, upgrade them according to the instructions.
1: To open Device Manager, type devmgmt.msc into the Area dialogue and press OK.
2: From the context menu, right-click the chauffeur with an exclamation mark and select Update motorist.
3: Select automatically search for updated chauffeur software. Then follow the onscreen instructions to complete the motorist upgrade. If Windows is unable to locate the most recent driver software for your device, you can manually download the most recent version from the chauffeur’s main website.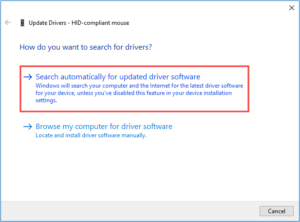
Finally, reboot your computer to verify if the problem has been resolved.
Conclusion:
That concludes the services for resolving the error “driver WudfRd failed to load.” I hope you find this information useful.